How to Blend Two Images Naturally: Lighting, Shadows and Edges
Blend two images into one believable scene. Match light direction, add contact shadows, check scale and edges, and use a prompt you can adapt.
 AI Photo Combiner
Short answer: to blend two images naturally, tell the AI what comes from each photo, where the subject belongs, and which light source both should share. Match the camera angle and scale, ask for a contact shadow where the subject touches a surface, then inspect the edges before downloading. “Blend these seamlessly” gives the model much less direction.
2 references · 1K · 10 credits · check light, shadows and edges before saving
What you need
- A clear subject reference: a person, product or object whose outline and details are visible.
- A scene with room for it: choose a plausible surface or position, rather than an already crowded composition.
- Two supported files: JPG, PNG or WebP, up to 8 MB each, with the rights and permissions needed to use them.
- An account and credits: two references at 1K cost 10 credits. The signup grant covers one such attempt for a new account.
This walkthrough uses an accent chair and a living room, combined in one generation through the website. The same checks apply to people and other objects, though hair, hands, glass and reflections may need closer inspection.
Why a blend can look artificial
A subject can have a clean outline and still look out of place. Check how it relates to the scene:
| What you notice | What to check |
|---|---|
| The subject seems lit from the wrong side | Which side faces the scene’s main light? Do highlights and shadows agree with it? |
| The object seems to float | Is there a shadow directly beneath the point of contact? Does the base meet the surface? |
| The subject looks too large or small | Compare its size with a nearby chair, table edge or other familiar object. |
| The outline looks cut out | Look for halos, leftover source background and edges that are much sharper than the scene. |
| The subject feels like a different photograph | Compare color temperature, contrast, camera angle and focus with nearby objects. |
Start with the most visible mismatch. A scale problem needs a different instruction from a lighting problem; adding more general words such as “realistic” may leave both unresolved.
Step 1: Choose images that can share a viewpoint
For this example, image 1 supplies the room, floor, sofa and light. Image 2 supplies the chair.
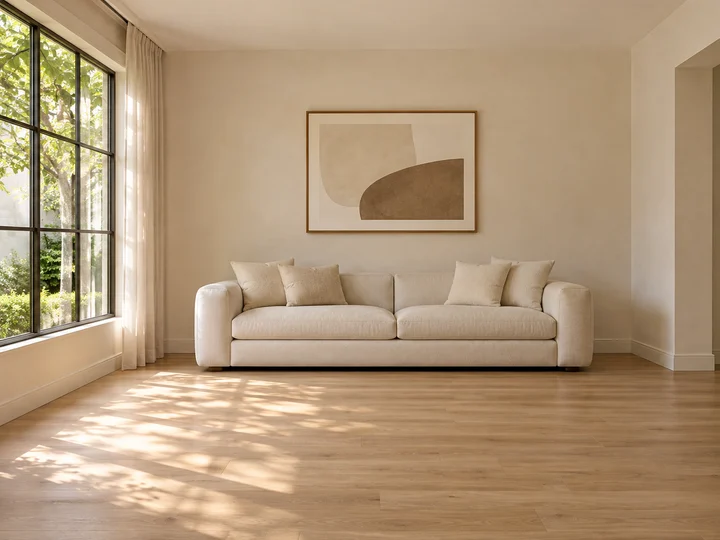
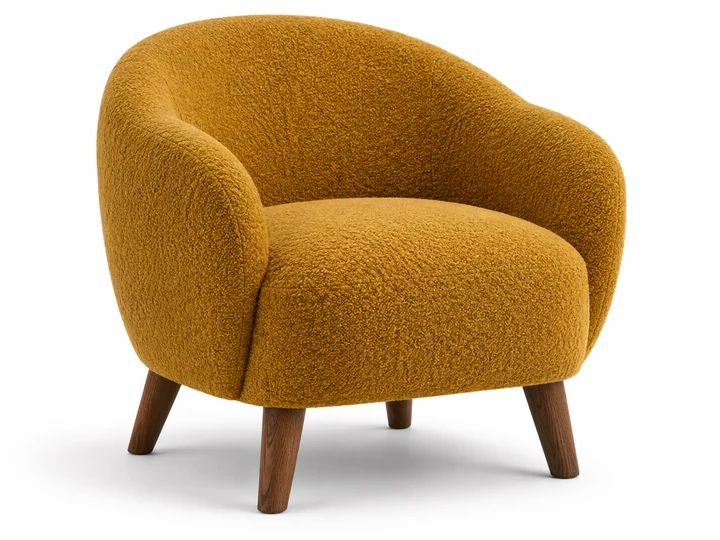
Image 2: the chair, including its outline, fabric and legs.
The chair reference shows its front and side; the room provides a floor plane and a sofa to judge its size against. A chair photographed only from directly above would require a much larger change of viewpoint.
Before uploading your own pair, ask:
- Where will the subject sit? Name a surface or an open area.
- Where is the main light? Use a visible cue, such as the living-room window on the left.
- What establishes scale? Here, the sofa gives you a size reference.
- What should stay recognizable? For the chair, it is the rounded shape, ochre fabric and dark wooden legs.
These are planning checks, not guarantees of a successful generation. If the references strongly disagree, choosing a more compatible pair can be more useful than adding a long list of corrections.
Step 2: Describe placement, lighting and contact
Open the AI Image Combiner workspace. Choose Custom combination, upload the room as image 1 and the chair as image 2, then edit Describe your idea.
For this task, a useful prompt has four parts: subject → position and size → light → contact and edges. Try this starting version with your own references:
Use image 1 as the living room. Add exactly one ochre boucle accent chair from image 2 on the open floor in front of the sofa, slightly right of center, angled toward the left. Keep the room architecture, window, sofa and camera view. Preserve the chair shape, fabric texture and dark wooden legs. Make the chair a realistic size relative to the sofa. Match the soft daylight entering from the left window, with brighter fabric on the left and gentle shadows extending to the right. Add contact shadows directly under each chair leg so they rest on the floor. Blend the chair edges naturally with the room without white halos or leftover studio background. Match perspective, color balance and sharpness. No extra furniture or people.
This is the exact prompt submitted through the website for the result below. Change the light direction and placement to match your own scene; copying “light from the left” into a scene lit from the right creates a conflict.
Match the light before asking for extra detail
Describe the main source and its softness. “Soft daylight from the left window” is more actionable than “beautiful cinematic lighting.”
Check brightness and color together. A subject lit by a cool flash can look detached from a warm room even when its shadow points the right way. Ask it to share the scene’s light and color balance. Avoid adding several contradictory sources unless the scene actually calls for them.
Ask for contact, not just a shadow
A contact shadow is the darkening where an object touches a surface. It helps the chair legs feel grounded on the floor. A cast shadow extends away from the object as it blocks light.
“Add a shadow” leaves both placement and direction open. Specify the contact point first, then describe a cast shadow consistent with the scene. Don't ask for a heavy black shadow under an object in soft, diffuse light.
Check edges and overlaps
Look around the chair back, armrests and legs, including the gaps between them. Ask for no source-background halo and for sharpness that fits nearby objects. If something should pass in front of the subject, describe that overlap explicitly.
For a person, inspect hair against the background and where clothing meets furniture. For detailed face checks, see how to keep faces recognizable when combining photos.
Step 3: Generate, inspect and download
Choose 1K and an aspect ratio suited to the scene. This website run used 4:3. Two references cost 10 credits at 1K; check the displayed total before clicking Combine my images. Sign in and confirm image permissions to generate.
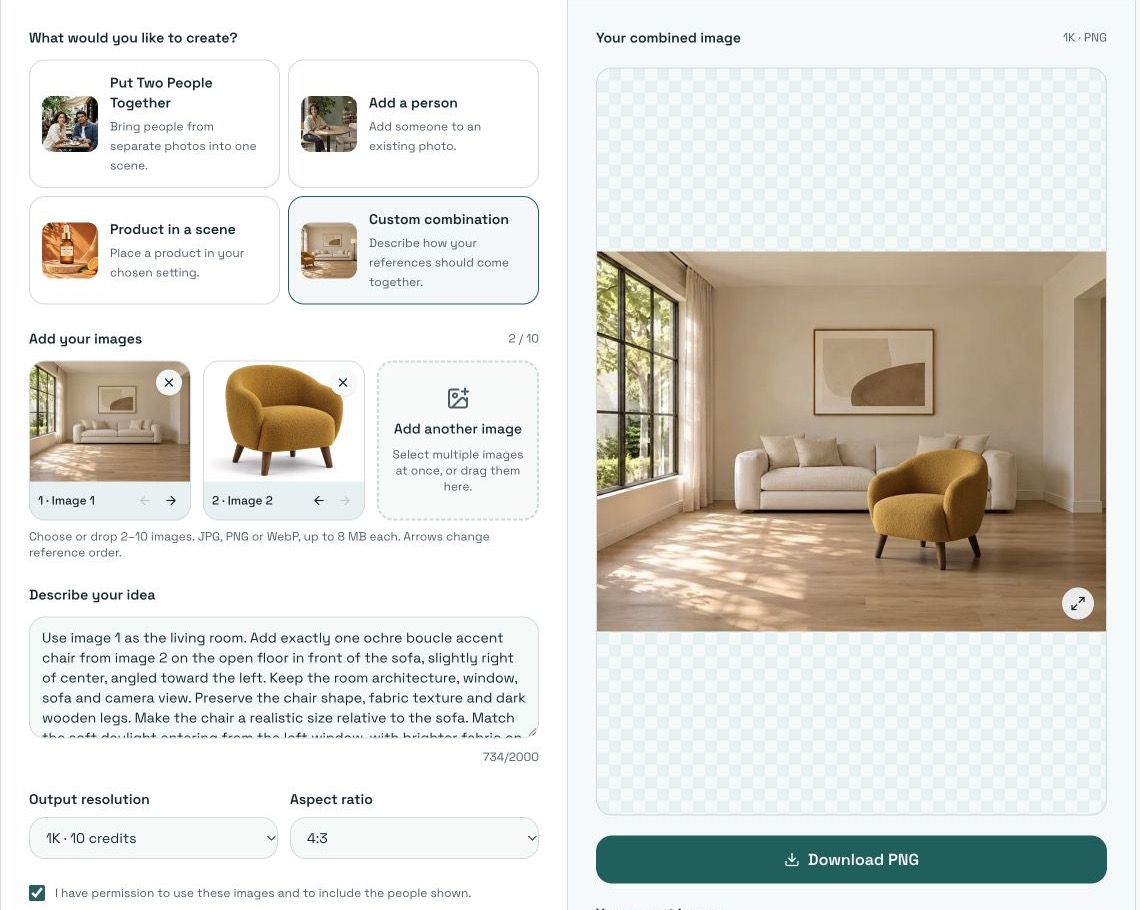
The completed run in the local website workspace: Custom combination, two references, 1K and 4:3.
Inspect the overall scene first, then the subject at full size:
- Size and perspective: is the chair a plausible size beside the sofa, with its legs meeting the floor?
- Light: does the brighter side fit the window direction?
- Contact and shadow: do the legs rest on the floor, with plausible contact and cast shadows?
- Edges and material: are the back, armrests, fabric and legs coherent? Is there a halo?
Click Download PNG when the result meets your needs. A larger output is not automatically a better blend: two references cost 15 credits at 2K or 23 at 4K, and the same composition problems can remain.
Website example: an accent chair added to the living room
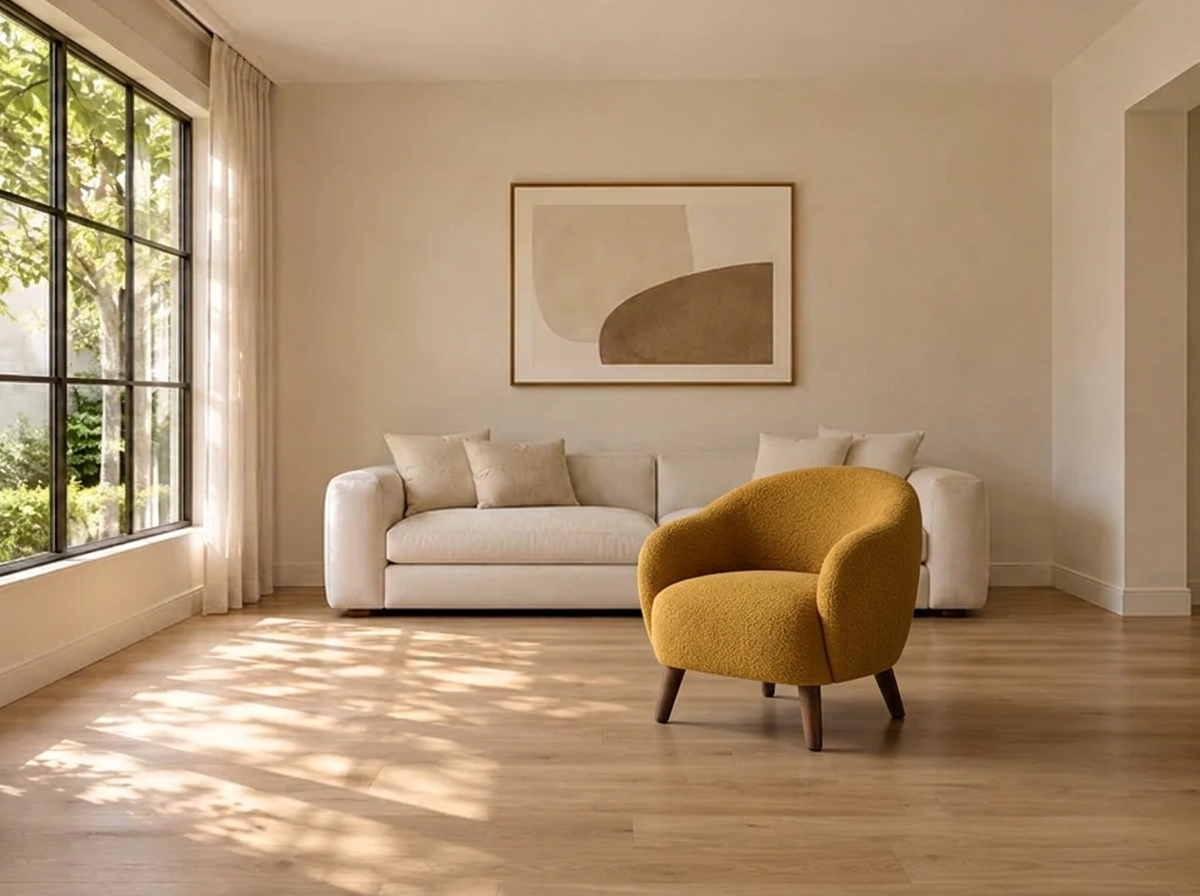
The chair appears in front of the sofa, slightly right of center. Its ochre upholstery and rounded silhouette remain visible. The left arm and seat catch the window light, while darker areas sit under the chair and around the leg-to-floor contacts. The outline no longer carries the white studio background from image 2.
There are limits to what this example shows. The room already had patterned sunlight in the source, so that floor pattern is not evidence that the tool invented physically correct chair shadows. Compare the chair legs and the shadow beneath them separately. Background details can also be redrawn; this result is a visual composition, not a pixel-preserving edit.
Actual run: November 3, 2026, through the local AI Photo Combiner website. We uploaded the two references, selected Custom combination · 1K · 4:3, submitted the prompt above, and downloaded the completed PNG. The task consumed 10 local test credits. No real checkout was tested, and this does not establish production-site behavior.
The two input images were AI-created reference assets, not real-world photographs. The output above was generated by the website's Nano Banana 2.1 workflow, not supplied as an illustration or generated by calling the provider directly. This was one attempt, not a before-and-after repair experiment; it does not show which individual prompt instruction caused a particular effect.
What to change if the blend still looks wrong
Use these targeted instructions as starting suggestions. Change one main issue at a time so you can judge the next output.
| Visible problem | A more specific instruction to try |
|---|---|
| Light comes from the wrong side | Match the window light from the left; put the brighter side toward the window and the cast shadow to the right. Adapt directions to your scene. |
| The chair seems to float above the floor | Rest each leg on the floor and add subtle contact shadows at those junctions. |
| The object overwhelms the scene | Use a realistic armchair size relative to the sofa; leave visible floor space around it. |
| A pale outline surrounds the chair | Remove the white studio-background halo around the chair and match edge sharpness to the room. |
| The result is too warm or too cool | Match the subject’s color balance to the nearby scene under the same light. |
These suggestions are not measured fixes. Each new generation costs credits, including another attempt to improve a completed result. Keep the references and earlier prompt so you can compare versions.
If precise boundaries or an unchanged background are essential, finish in an editor with layers and masks. If you are combining two people rather than a product and a room, use the two-person photo tutorial for the matching mode and upload order, then apply the lighting and edge checks here.
Give the subject a place, a shared light source and a believable point of contact.
Frequently asked questions
- How do I make two images look like one natural photo?
- Give the subject and background compatible camera angles, then describe placement, light direction, scale and contact shadows. Inspect the result at full size; a detailed prompt does not guarantee a seamless blend.
- Why does the added subject look pasted on?
- Look for mismatched brightness or color, missing contact shadows, incorrect scale, and a pale or dark outline around the subject. Identify the visible problem before changing your prompt or reference.
- Can I remove obvious edges with a prompt?
- You can ask for clean edges without halos and for foreground objects to overlap naturally. Results vary. If the exact boundary needs manual control, use an editor with layers and masks.
- Does 4K make an image blend more naturally?
- A higher resolution gives a larger output, but it does not automatically fix wrong shadows, scale or perspective. Check the composition at 1K before choosing a more expensive generation.
- Can I blend two images for free?
- New accounts receive 10 signup credits, enough for one generation with two references at 1K. Sign-in is required. Further attempts and higher resolutions need additional credits.